Prepare your environment for your App development
Step By Step creation of Provider Hosted App hosted on O365 (SharePoint
online) with local IIS
The following steps are required for creating a provider
hosted App
Step 1 - Create O365 Tenant – You can skip this
step if you already have a tenant created.
Step 2 - SharePoint Online Developer Site - You
can skip this step if you already have a developer site created.
Step 3 - Install Visual Studios - You can skip
this step if you already have a Visual Studio 2013/2015 with Office Tools.
Step 4 - Create Provider Hosted APP Project in
VS2015.
Step 5 Enabling SSL on IIS Using Self-Signed
Certificates
Step 6 - Create local Web APP and configure SSL
for Apps.
Step 7 - Create Client ID and Client Secret.
Step 8 - Use Client ID and Client Secret created
in the step above in the VS 2015 project.
Step
9 – Build , deploy and Run the App
Introduction
SharePoint and office
development model is changing to a new App model. This is the new development
model for SharePoint. In this blog I will walk you through creating a provider
hosted SharePoint App that is hosted in your local IIS. This will show the following
key features:
·
How to prepare your environment for your App development?
·
How to develop a provider hosted App that is hosted in local IIS websites
and linked to Office 365 / SharePoint Online?
·
How to use the Client Object Model (CSOM) to read and write data
back to SharePoint using the credentials of the logged in user?
What are Apps?
What are APPs?
Advantages on all the Web Applications are becoming APPs?
"Apps"
is not just a marketing strategy to increase use of SharePoint, but also a
replacement to the sandbox approach with many advantages for both Development
and Configuration. Sandbox Solutions are introduced in SharePoint 2010 and now
they are deprecated, to force/encourage the usage of Apps.
·
Custom
code will not be executed on server. So this can avoid, Application / Server
outages.
·
Custom
code will be executed in Client-Browser or may be in some other scope like IIS
or Windows Azure, which is completely out of SharePoint scope.
·
Server
Object Model (SOM) code is replaced by Client side object model (CSOM) / Rest
Services using which Apps can communicate with Server.
·
Authentication
is done by “OAuth”.
·
Installing
/ Updating / Uninstalling of apps can be done without affecting the SharePoint
site.
·
Better
usability in Tablets and Mobile devices.
·
Taking
SharePoint to next level in terms of Usability, Development, Deployment and
Hosting (cloud).
·
Finally,
everything in SharePoint online is an App.
Hosting Options in Apps
1. Provider-hosted
2. SharePoint-hosted
“Auto-hosted” Apps program has ended by Microsoft on June 30,
2014 which was another option to create an APP.
How apps work?
This has been
divided into two steps so that we understand them better with screenshot from
actual demo example.
LET US BEGIN.
Step By Step creation of Provider Hosted App hosted on O365 (SharePoint
online) and IIS
Step 1 Create O365 Tenant (Developer Site)
This is the
starting point of the blog series for creating a Provider hosted APP using MVC.
To start with,
one needs to have an O365 tenant provisioned
§ Open Internet Explorer.
§ Navigate to
http://www.microsoft.com/office365.
§ Select the link to start your free
trial. Click on the free trial option. Refer the screenshot below :
§ Enter your details as per the
requirement company information
§ In this Step 2 option, enter your
desired tenant account name. If the name you want is already taken, don’t
worry. You can still add your own public domain name. The name entered here is
just for your Microsoft Office 365 Tenant account (domain.onmicrosoft.com).
·
Click
Create my Account. Please refer the screen shot below :
Once the O365 Tenant is created make sure that the all the
services are up and running. Please click on the link below:
·
https://portal.office.com/admin
: This link gives you the dashboard view of all the required services.
Step 2 SharePoint Online DEV Site.
1. Sign in to Office 365 as a Global or
SharePoint Online admin.
You must sign in as a
Global or SharePoint Online admin to create new site collections, such as a Developer Site. Only admins
can see Admin options when signing into Office 365. If you’re not an admin,
contact an admin in your company and have them do one of the following:
o Grant you admin rights, so you can create the
Developer Site yourself.
o Create the Developer Site for you, and specify
you as an admin for the site collection.
2. Click the App Launcher button on the far left
of the navigation bar at top.
3. Click the Admin tile.
4. In the navigation tree on the left, expand Admin,
and select SharePoint.
In the SharePoint admin center, on
the Site Collections tab, click New > Private Site
Collection
In the New Site Collection dialog
box, provide information about your Developer Site.
Click the following
image to walk through new site collection options in the dialog box, or refer
to the table under the image for guidance
Click OK.
You’ll see the new
developer site URL in the Site Collections list. When the site
creation is finished, you can navigate to the URL to open your Developer Site.
Once your developer site is opened, copy the URL. We will be using this URL for
the development purpose.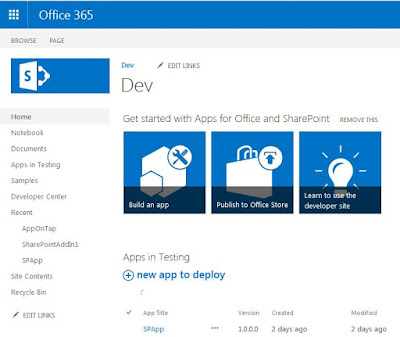
Step
3 Install Visual Studios 2015.
Visual Studio 2015 version includes the Microsoft Office
Developer Tools. Make sure that you have the latest version of the tool
available. To do this, run the installer for Office Developer Tools for Visual
Studio 2015.
Step 4 Create Provider
Hosted APP Project in VS2015.
A provider-hosted app for SharePoint consists of both an app for
SharePoint that is deployed directly to a SharePoint 2015 site and a separately
deployed web application.
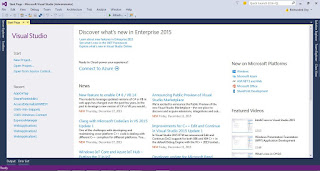
Open the Visual Studio 2015 as Administrator.
As shown in the screenshot below:
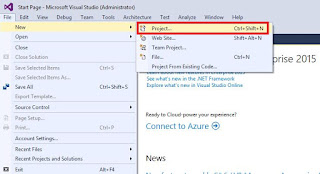
Click File.
Go to New.
Select Project
Select the Template “SharePoint Add-In”.
Name the Project as HelloAppModel. As shown in the screenshot below
Select the Provider hosted App and enter the URL of the DEV
Site and then click “Next”. As shown in the screenshot below
Sign in with your “(tenant).onmicrosoft.com” credentials. On the O365 prompt.
As shown in the screenshot below
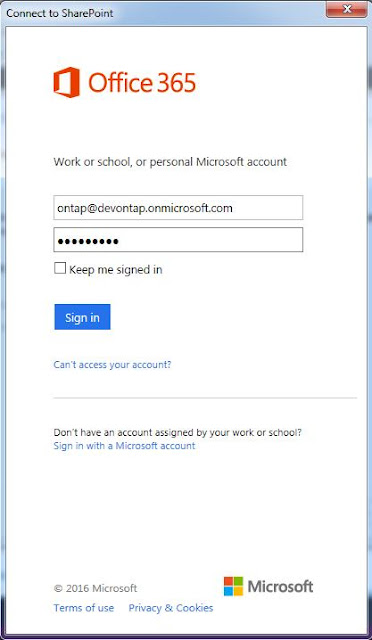
It will Automatically selected SharePoint Online option after
successfully sign-in. As shown in the screenshot below
Select
“ASP.NET MVC Web Application” and click “Next”. As shown in the
screenshot below
Select “Use
Windows Control Access Control Service” option and click “Finish”. As shown
in the screenshot below
Click Finish.
Two projects
will be created.
1. App Project (HelloAppModel)– This is going to be deployed
on the SharePoint.
2. AppWeb Project (HelloAppModelWeb)– This is going to be the
.Net Web Application. This application will be hosted on any IIS. As shown in the screenshot below
Step 5 Enabling SSL on IIS Using Self-Signed Certificates
Step 1: Create a new Self Signed Certificate
Before binding SSL
rules to our new site, we need to first import and setup a security
certificate to use with the SSL binding.
Certificates are
managed in IIS 7.0 by clicking the root machine node in the left-hand tree-view
explorer, and then selecting the "Server Certificates" icon in the
feature pane on the right:
This will then list
all certificates registered on the machine, and allow you to optionally import
and/or create new ones.
I could optionally
go to a certificate authority like Verisign and purchase a certificate to
import using this admin UI. Alternatively, I can create a
"self-signed certificate" which is a test certificate that I can use
during the development and testing of my site. To-do this, click the
"Create Self-Signed Certificate" link on the right-hand side of the
admin tool:
Enter a name to use
for the certificate (for example: "test") and hit ok. IIS7 will
then automatically create a new self-signed crypto certificate for you and
register it on the machine:
Step 2: Enable HTTPS Bindings for our Site
To SSL enable the
web-site we created earlier, select the web-site node in the left-hand
tree-view, and the click the "Bindings" link in its
"actions" pane on the right-hand side of the screen:
This will then bring
up a dialog that lists all of the binding rules that direct traffic to this
site (meaning the host-header/IP address/port combinations for the site):
To enable SSL for
the site, we'll want to click the "Add" button. This
will bring up an "add binding" dialog that we can use to
add HTTPS protocol support. We can select the self-signed certificate we
created earlier from the SSL certificate dropdownlist in the dialog, and in
doing so indicate that we want to use that certificate when encrypting
content over SSL:
Click ok, and we now
have SSL enabled for our site:
Step 3: Test out the Site
Add a
"default.aspx" page to the site, and then try and hit it with the
browser by typinghttps://localhost/default.aspx (note
the usage of "https" instead of "http" to indicate that you
want to connect over SSL).
If you are using IE,
you'll likely see this anti-phishing error message kick in
Step 6 Create local Web App and configure IIS for Apps
Go to the Property of the AppWeb project and make sure that the Target Framework
is set to 4.5.
Create the virtual directory host our AppWeb on the Local
IIS, instead of using the IIS Express, let us host our application on the IIS
itself.
Please note put https:// instead of http:// as we configured SSL our default
website(localhost) in step 5.
By clicking the “Create Virtual Directory” button on the Web
Tab, virtual directory will be created on the local IIS.
You can confirm this by going to inetmgr.
After the property configurations, we are ready with our
Provider Hosted Application. Rebuild the solution to make sure everything is
fine.
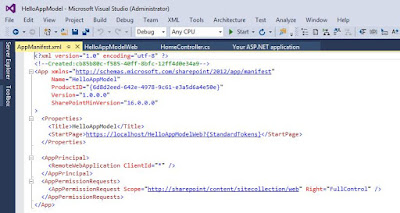
Go to the AppManifest.xml in the App project.
AppManifest file will be looking like this.
Modify the Start Page attribute to point the IIS directly.
Please refer the below figure.
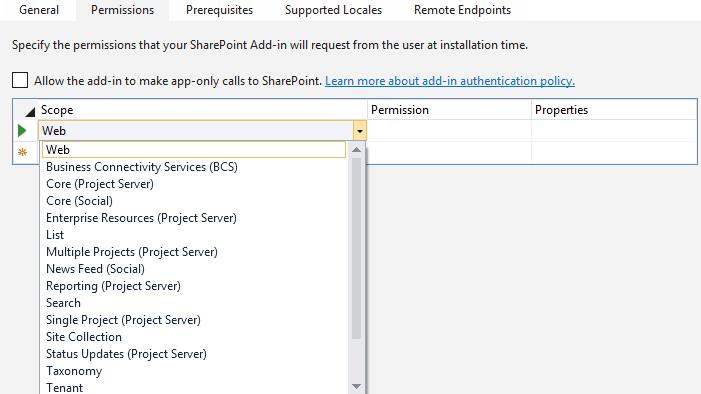
Go to Permissions Tab. Add the corresponding scope and the
permissions as per the requirement. In this demo, I am adding the web as full
control. This will give the rights to do CRUD Operations over the list present
with in my web.
By doing this, we are sure that our app is
having the Full Control Permission through the Web Scope.The AppManifest.xml
will be like this.
Now, we came to the final step of our provider hosted application creation.
That is, we need to register our clientID with the SharePoint before deploying
the app.
Step 7 Create Client ID and Client Secret.
As a guideline for registering an APP on SharePoint, one
needs to have a client ID and Client Secret. To create, refer to the steps
given below:
Open the DEV Site created in Step 2.
Append “/_layouts/15/appregnew.aspx” at the end of
the URL and click enter. This is the APP registration hidden URL. As shown in
the screenshot below.
Click on Generate Button for creating the Client ID
and Client Secret. Enter the value as described below:
Client ID: To be used in “Web.Config” of MVC
Project and “App.Manifest” of Provider hosted App Project.
Client Secret: To be used in “Web.Config” of
MVC Project and “App.Manifest” of Provider hosted App Project.
Title: Add the Title to the Application. E.g. (use
project name). To fill the App Domain and Redirect URL:
App Domain: This is the domain used for the Web App
in IIS created in STEP 5 above.
Redirect URL: This the redirect URL, to be used from
STEP 5 above.E.g.
App Domain: localhost
Redirect URL: https://localhost/HelloAppModelWeb
Please see the screen shot below for reference:
Final entry
will look as shown below:
Click “Create” button and the following successful creation
will show on the result page As shown in the screenshot below (Do not close
the page):
Step 8 Use Client ID and Client Secret created in the step above in the VS 2015
project.
Once the Client ID and Client Secret is created follow the
steps below:
Open the App.Menifest.xml file. To open this Right Click on
the file and select Open Code. Please see the screen shot below for reference:
Replace the Client ID generate in Step 6. As shown in the
screenshot below:
Open the “Web.Config” of the MVC Project and enter
the Client ID and Client Secret generated. As shown in the screenshot below:
Step 9 Build, Deploy and Run the App.
Once all the above step are completed it is time to re-build
the project and deploy it office 365.
Simply hit F5 / Click start to
start the deployment and debugging.
This will ask you to login to your site as below.
Then it will ask you if you trust this App .
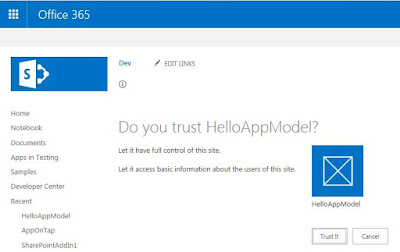
Click “Trust It” and here you go.
you'll likely see this anti-phishing error message kick in. Click “Continue to this site.”
Finally , launch the App from our SharePoint Portal. you can see the URL
is referring back to your machine and the source URL is the SharePoint online
URL.
With this we are now familiar with creating a Provider
Hosted Application. I hope this helps, just
leave a comment if it does.